Material Templates
Stored in MaterialTemplates.blend, this is where the addon will look up node setups for
each shader, copy it over to the material and fill it with textures and parameters.
Basics
Every material in the file is a template. Despite not needing to be attached to an object, it’s recommended to set up a dummy object to hold all the materials.
Every templates file should also have at least a FALLBACK material, which is used
whenever a shader does not have its own template set up yet.
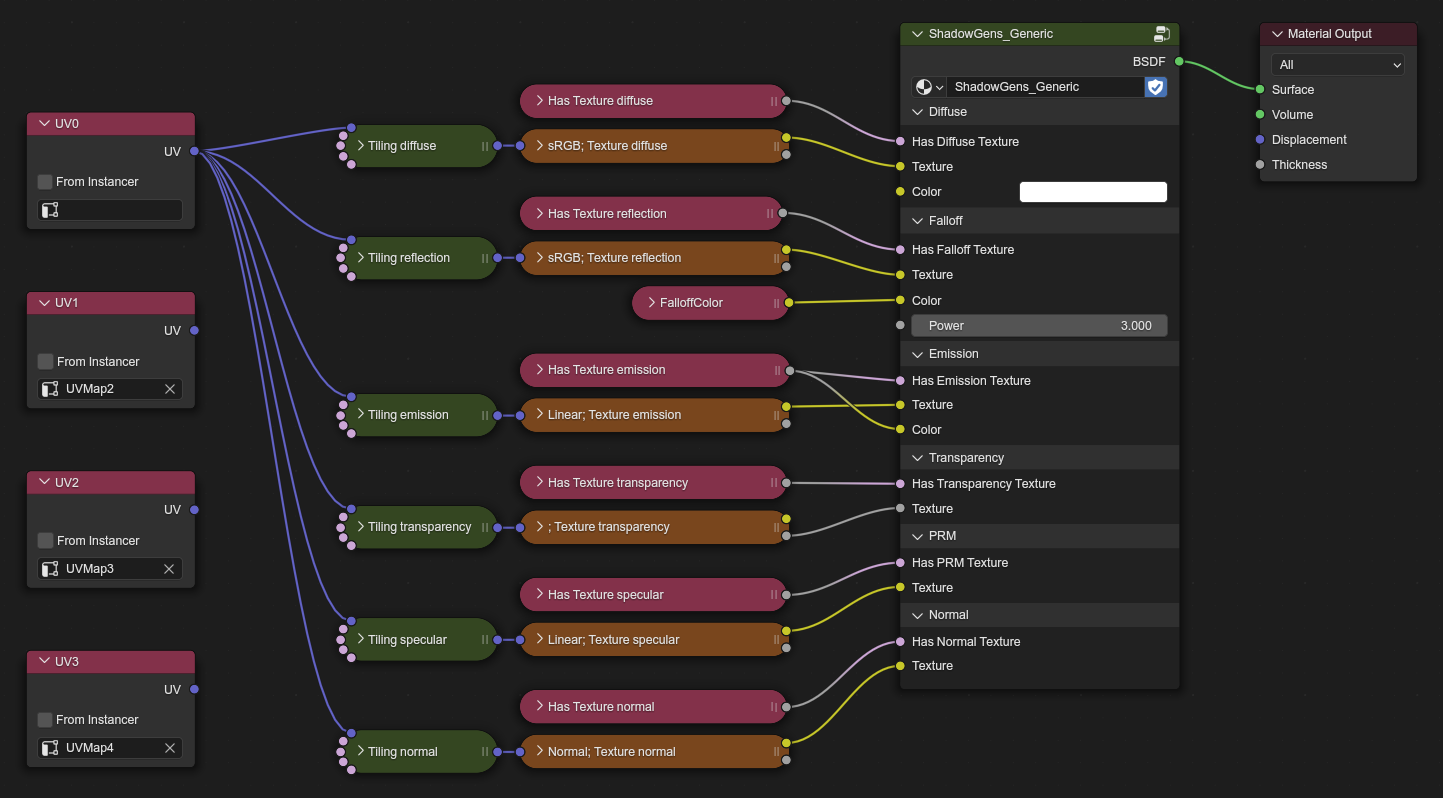
Example: The FALLBACK material setup for Shadow Generations
Node Setups
First and foremost, the addon accesses and modifies nodes by their name (not their label!), so make sure to correctly name nodes that interface with parameters and textures!
HEIO Common nodes
The addon provides blend files with a range of custom node groups that are meant to be used in each material template file.
Important
If you add a node tree to a templates file, make sure to link and not append or copy-paste it!
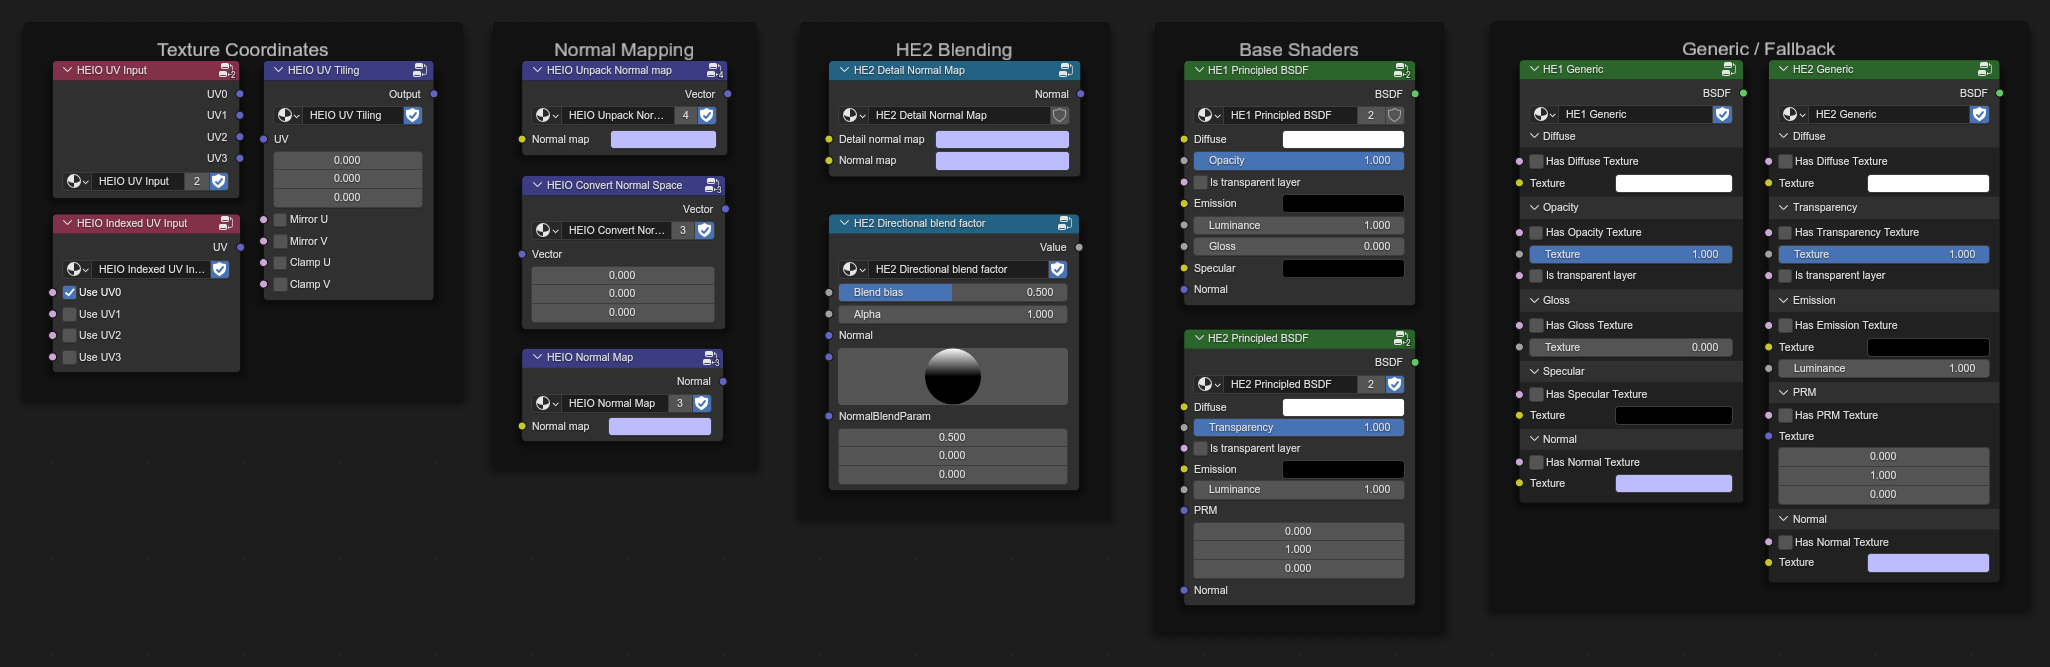
The current common node groups as of dev version 0.1.21
Parameter nodes
Float and color parameters can be assigned to multiple different types of nodes:
An RGB node
A combine color node (in RGB mode)
A value node (gets filled with the x/red value)
A value node with the name followed by
.wor.a(gets filled with the w/alpha value)
Boolean parameters can only be assigned to value node,
which receives a 1 if the parameter is set to true, and otherwise a 0.
“System” nodes
Similar to parameter nodes, there exist “system” nodes that get filled based on other material properties
- Layer Opaque
A value node with the name
Layer Opaque, which receives a1if the material layer resolves toOpaque, otherwise0.- Layer Transparent
A value node with the name
Layer Transparent, which receives a1if the material layer resolves toTransparentorPunch-through, otherwise0.- Layer Special
A value node with the name
Layer Special, which receives a1if the material layer resolves toSpecial, otherwise0.
Texture Nodes
To properly make use of textures, you need to set up several nodes, of which their names need to end with the texture type name they are set up for.
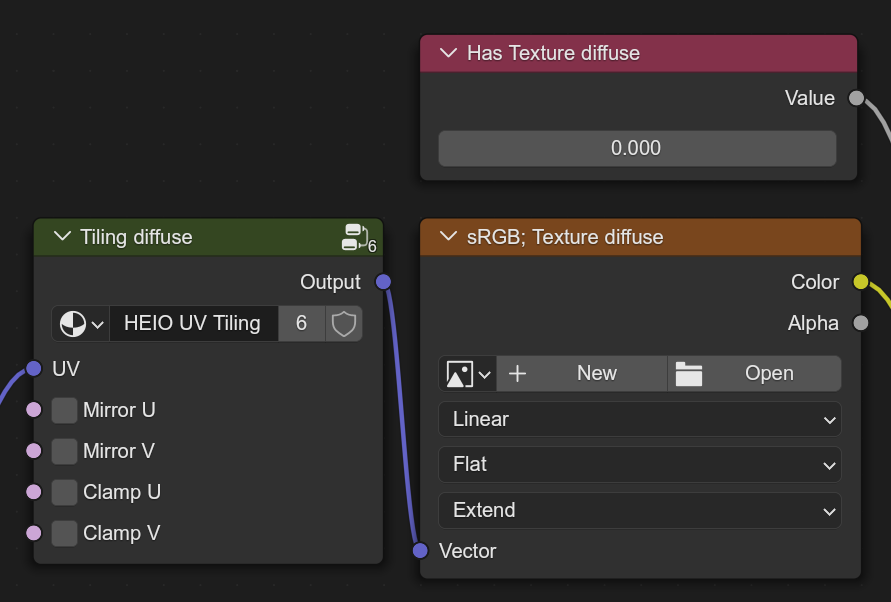
example for a texture nodes setup
It should be noted that all of these are optional and not required, and the setup may even vary
based on the shader you are trying to replicate. For example, many shaders do not make use of the
texture coordinate index of the texture, and can just be linked to the corresponding output of the
static HEIO UV Input node.
Important
If a shader has a texture type more than once, and you want to make use of the second or even third texture entry, you need to append the occurrance index to the end of the type.
For example, if you have 3 diffuse textures, the first one remains as is, while the
second one uses diffuse1 and the third one uses diffuse2.
- The Image node
An image texture node with the name
Texture(e.g.Texture diffuse) for sampling the actual image.The image node also has special behavior regarding its label: By default, images get laoded using the default “image type” in the target info file. If the default is not correct for your case, you can specify an “image type” by adding it to the start of a label and following it up with a
;.Following texture types exist:
sRGB: Color textureLinear: Non-color textureNormal: Normal map (will enable y-channel flipping on import/export)
For example: A normalmap texture would get an image texture node with the name
Texture normaland the labelNormal; Texture normal.- The “Has Texture” node
A value node with the name
Has Texture(e.g.Has Texture diffuse), which receives a1if an image is provided, otherwise0.- The UV Tiling node
A group node with the
HEIO UV Tilingnode tree and the nameTiling(e.g.Tiling diffuse).This node tree gets linked from the common node groups file.
- The Indexed UV Input node
A group node with the
HEIO Indexed UV Inputnode tree and the nameUV(e.g.UV diffuse).This node tree gets linked from the common node groups file.